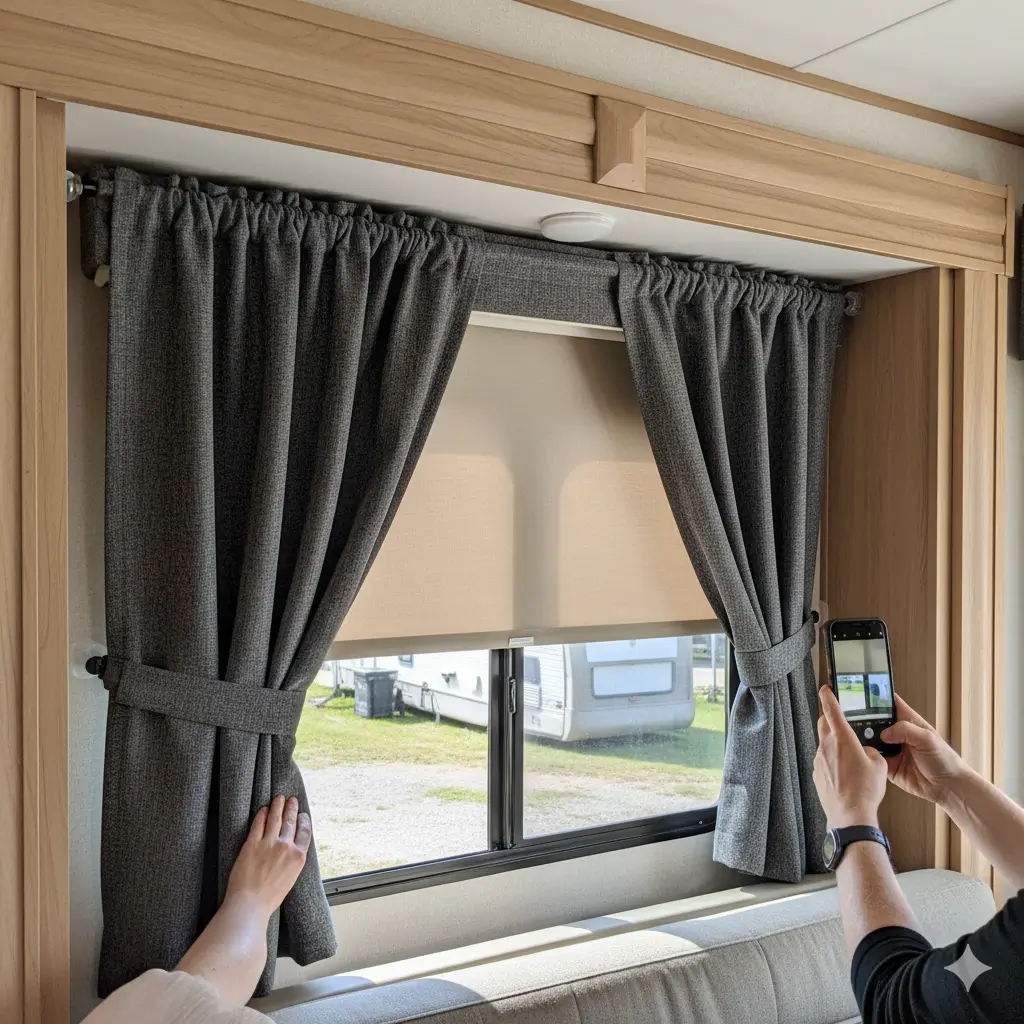
Aren’t your RV roller shades providing enough privacy, light control, insulation, and noise rejection and you want to layer them with curtains without drilling? Just get ready. This post explores 9 clever, super-simple, and super-economical ways to hang curtains over roller shades without damaging the walls of your RV travel trailer.
A short-term, reversible DIY method is to attach curtains to roller blinds using simple safety clips, which might be easily available in your RV’s DIY kit. Other options include tap-in curtain brackets, curtain clip rings, removable cloth pegs, tension rods, magnetic curtain rods, etc.
4 Functional, No-drill Curtains You Can Consider Hanging over RV Roller Blinds
- Blackout curtains – when you need to turn your RV into a calm, private sanctuary to sleep, while it’s still speeding on the road
- Sheer Curtains – fit for your motorhome’s living area for better, cooler filtered light
- Slim, single-panel curtains – when you need to add functionality to your RV windows with space-saving covers
- Pleated panel curtains – an energy efficient option to enhance your RV’s indoor temperature
- Cafe curtains – strike balance between privacy and natural light, while also increasing the visual impact of your RV window coverings
Safety Measures
- Travelling with kids under 12? Always look for cordless (string-free) curtains which are child-safe (CPSC-approved).
- Also, make sure the do-drill installation option is cordless.
9 Clever DIY Tips to Hang Curtains over Roller Shades in Your RV without Drilling

1. Safety Pins – a Temporary, Reversible Solution
- Step 1: Gather 1 to 3 dozen safety pins, depending on the width of the pre-installed roller shades
- Step 2: Pin both the fabrics together, making sure the distance between consecutive safety pins is not more than 3 inches. If the roller shade is 48 inches wide, you’ll need 17 safety pins.
Pros
- The easiest method the layer curtains over RV roller blind, without any special tools
- Literally doubled light control and privacy
- Accidental insulation benefit – two fabrics closely layered will trap air to provide excellent insulation and energy efficiency
- Extremely affordable – a 84 pcs safety pin pack will cost around $25, (only if you don’t already have the pins in your DIY kit!)
Cons
- Risk of damaging the fabric/s if the safety pin is too thick
- Will give your RV window covering an unprofessional appearance
Expert Tip
To ensure wrinkle-free fit, first attach two pins, one each at the extreme end of the fabric. Also, keep the fabrics fully stretched when applying the safety pins.
2. Stitching Both the Fabrics Together – An Effective, Long-term Option
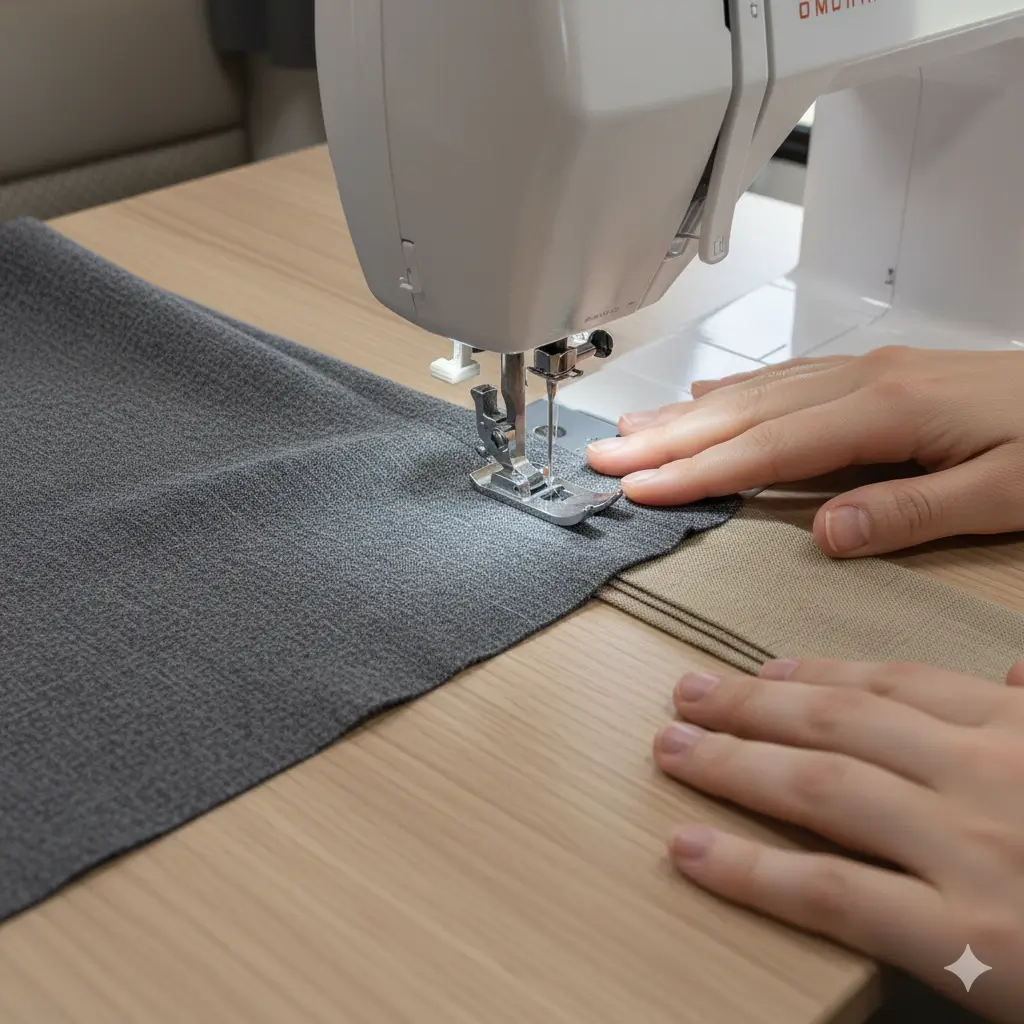
- Step 1: Cut the curtain fabric precisely to the size of the roller shades
- Step 2: Align both the fabrics edge to edge
- Step 3: Apply adhesive hooks at each of the four corners to keep the fabric stretched
- Step 4: Sew along the edges, with two seams running parallel.
Pros
- You’ll only need a needle and thread
- A permanent, cost-effective option for layering two blinds
- Will block more light and traffic noise, while still allowing precise adjustment
Cons
- A time consuming job
- You’ll need at least beginner-level stitching skill to complete the task
- If the curtain fabric isn’t thin enough, it’ll make the shade too thick to roll up smoothly
3. Curtain Clip Rings – A Super Easy Method to Hanging Curtains in Front of RV Roller Shades
- Step 1: Cut to size and firmly attach the curtain fabric to the existing headrail
- Step 2: Apply clip rings 3 to 4 inches apart
- Step 3: Test operation and make any adjustments or remove hurdles, if needed.
Pros
- Best for RV windows where you’ll be opening and closing the curtains on daily basis
- A permanent, cost-effective option for layering two blinds
Cons
- May not support fabrics heavier than 6 pounds
- Clips may become an eyesore if not concealed properly
4. Tap-in Curtain Brackets – Instant Installation of RV Curtains on any Size Window
- Step 1: Align the bracket to the trim of your RV window
- Step 2: Firmly tap the brackets in
- Step 3: Hang your curtains above the roller shades
Pros
- A sturdy, durable option to hang heavy drapes, up to 30 pounds!
- Effective soundproofing, blocking 20 to 40 decibels of traffic noise, (according to Decibel International), thanks to the ability of brackets to hold heavy curtains.
Cons
- Not the best option for metallic window frames
- May need a hammer to tap brackets into the wooden RV frame
Note
- Make sure the tap-in brackets are tall enough horizontally that they don’t obstruct the functioning of the already installed roller shades.
- Use double center support brackets if your camper truck windows are wider than 25 inches.
5. Magnetic Curtain Rods – Just Attaching is Installing!
- Step 1: Get cut-to-size curtains with rods that can snug-fit inside the window frame.
- Step 2: Align the rod inside the top of the frame, and it will get automatically attached to the metal frame. And done!
Pros
- Instant, secure hold for curtains
- Literally nothing needed for installation, except the curtains themselves
- Ability to adjust length
- Quick removal if you need to wash them
Cons
- Only suitable for lightweight curtains, about 5 to 7 pounds
- Magnets may unnecessarily add to the weight of your window covering
- Risky, if you have 8 to 10 year old kids and pets around, as they might pull the fabric and the headrail apart.
Safety Tip
Consider double securing magnetic rods to the window frame, using additional safety hooks, so they’ll be hard to pull or fall, reducing the risk of injury to your little ones travelling in the motorhome.
6. Removable Cloth Pegs – It’s Simply Like Hanging Clothes on Clothline
- Step 1: Completely roll down your blind.
- Step 2: Align the curtain fabric with that of the roller panel just under the roller tube.
- Step 3: Hold them together using pegs
- Step 4: Remove the pegs and the curtain when you need to roll up the blind at the back.
Pros
- Install and remove without damaging the RV window frame or walls
- Neat and secure hold for your layered curtains
- Easy to maintain – if they catch dirt, remove, dust them, and rehang
Cons
- A non-permanent solution
- Uncovered pegs will give an ugly look
7. Fasten Curtain Rod to Existing Roller Shade Brackets – A Zero-Skill Method
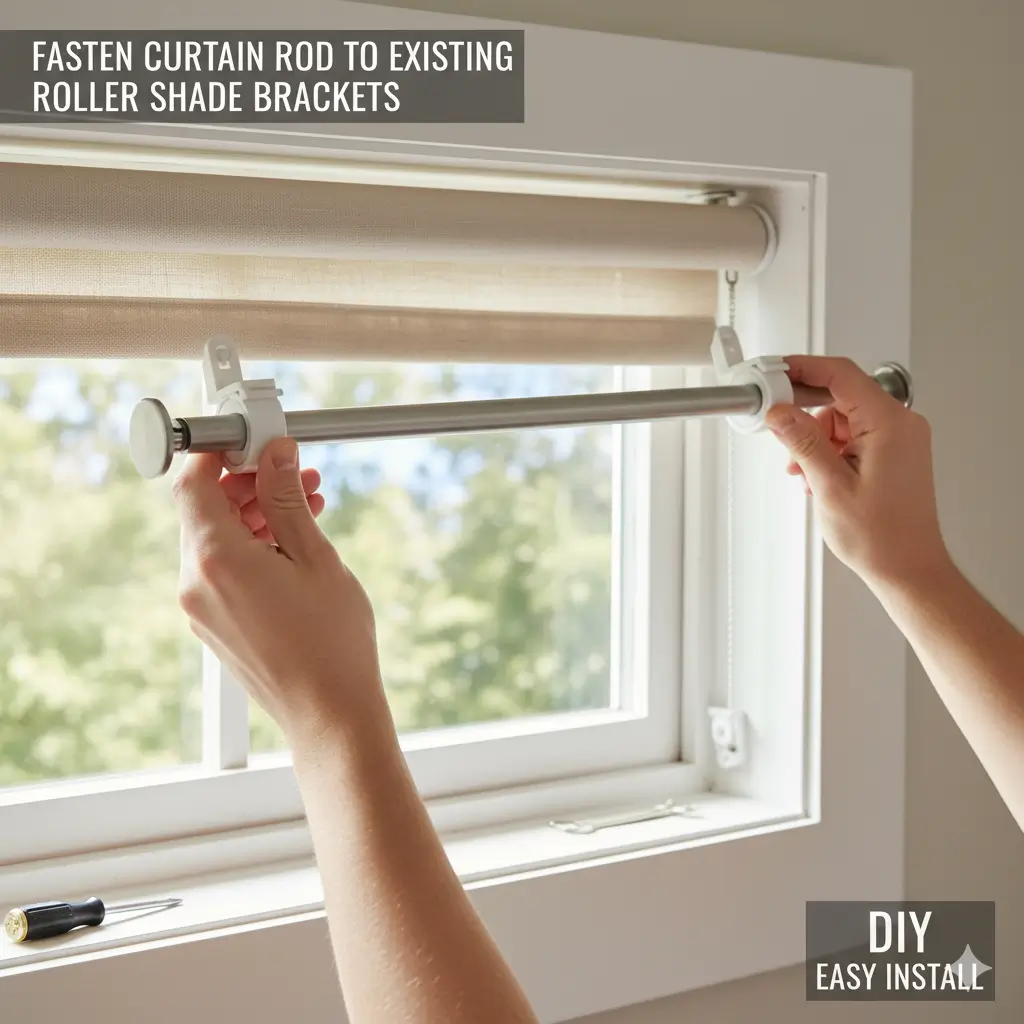
- Step 1: Place brackets of new curtains on the existing brackets
- Step 2: Use 2 inches wide pieces (the number will depend on the number of brackets) to create vertical gap between the brackets, so they won’t touch the roller mechanism of the existing blinds
- Step 3: Use pieces of the string to firmly fasten the brackets together.
- Step 4: Try operating both the curtain and the blind together, and make adjustments, if needed.
Pros
- Adjust privacy and light in your room by independently opening/closing (stretching/stacking) of the curtains and shades sideways
- You’ll only need a few pieces of string to layer curtains over roller shades
- A novice-level DIY method, no skill needed for installation.
Cons
- Frequent operation may cause the top brackets to get loosened or dislocated
- You will need a valance to conceal the new brackets, incurring an additional $40 to $70 expense.
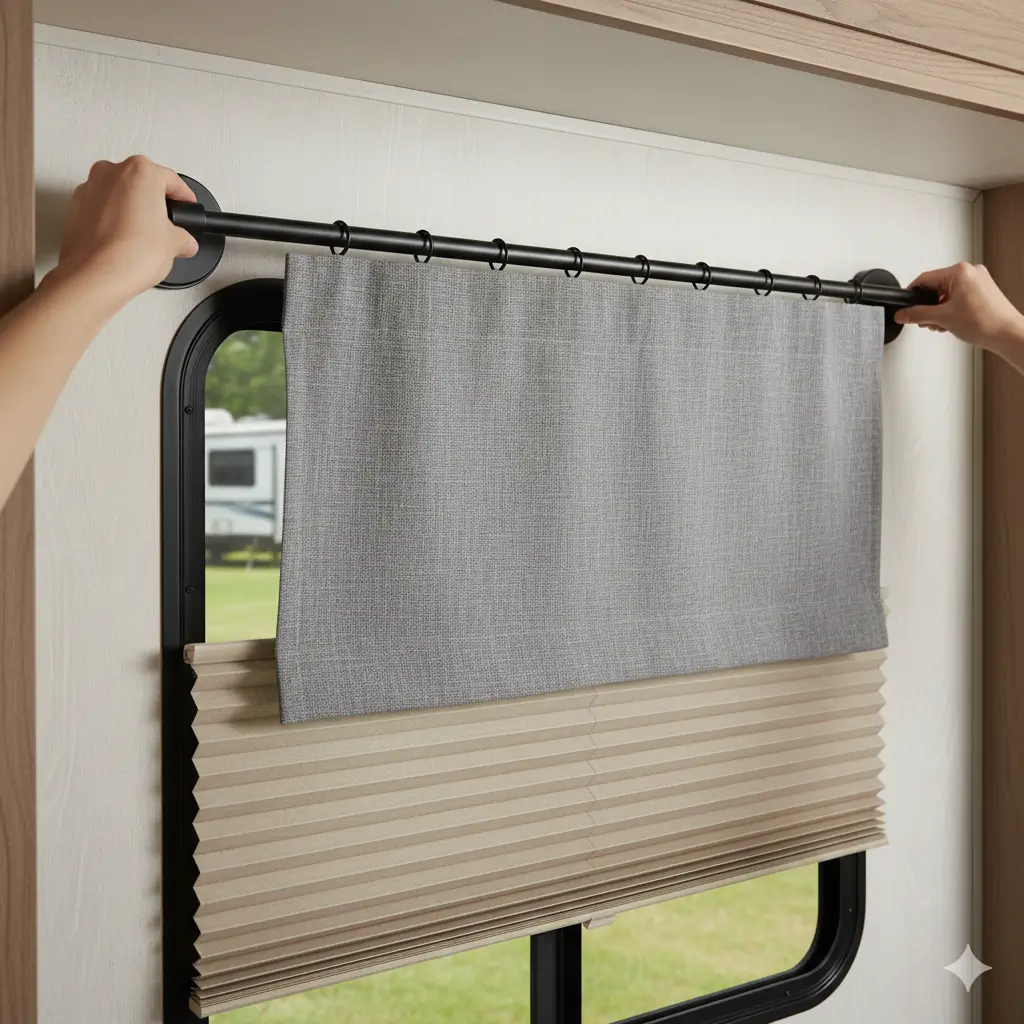
8. Spring Loaded Tension Rods – Effortless Installation
- Step 1: Position them between two facing surfaces in the interior of the frame.
- Step 2: Use a level tool to ensure 180-degree alignment of the rod
Pros
- Can be layered to be back of the roller shades, if brackets allow space for accommodating tension rod.
- Adjustable rod length – get edge-to-edge fit
- Suitable for smaller RV windows in kitchens, bathrooms and bedrooms
- Great, uncomplicated design
- Can be fitted in seconds!
- No marks or holes in the RV window frame
Cons
- Less stable compared to fixed models
- Prone to falling – unsuitable for heavy curtains and drapes
- May get crooked and slip on one side due to weight of curtains
Expert Advice
For faster grip, look for rods with strong internal springs and rubber ends.
9. Adhesive Hooks – Secure Grip to Wall
- Step 1: Gather 10 to 30 sturdy adhesive hooks, depending on the width of your vehicle’s window.
- Step 2: Determine desired height to hang curtains
- Step 3: Align hooks horizontally, 5 to 6 inches apart.
- Step 4: Attach the curtain to the hooks and start operating your curtain.
Pros
- 1-step drill-free, nail-free, hassle-free solution for installing curtains over RV roller shades
- Enhance decorative touch – elevate your RV’s overall look
- Easy to remove with little risk of wall damage
Cons
- Adhesive backing on adhesive hooks may harden and deteriorate over time
- May come off as the grip weakens over time
Caution
If the existing roller blinds are motorized, create a gap of at least, make sure the curtains are at least 4 inches apart, so they won’t interfere with the motorization mechanism.
Frequently Asked Questions
How to put up curtains in an RV?
Quick, one-step methods to put up curtains in an RV include snap in brackets, heavy-duty command hooks, sleek magnetic curtain rods, tension rods, and curtain clip rings.
Can you put curtains over roller shades?
Obviously, roller shades typically pair single panel sheer curtains to provide a layered look and better light filtering. You can layer neutral roll-up blinds with bold curtains to add a pop of color to your space.
Is there a way to put curtains up without drilling?
- Use magnetic curtain brackets (only compatible with metal window frames and inside mounts)
- Tap-in curtain brackets
- Hang curtains on self adhesive hooks
- Mount curtains on built-in hooks in the ceiling
- Peel-and-stick lightweight curtains
- Magnetic curtain rods (the easiest and quickest method to hang curtains without drilling)
- Twist-and-fit curtain hardware
- Spring-loaded curtain rods
- Specialized custom no-drill curtain brackets
- Two-sided adhesive strips
Do command strips work for curtains?
Yes, adhesive command strips are the perfect option to hang curtains without using any tools or drilling holes on the walls of your recreational vehicle. However, make sure the curtains are lightweight, measuring only up to 5 pounds. The curtain rod should be wider than 1.5 inches in diameter.
How do you fix a pull cord on a blind?
- Step 1: First, inspect the security pull cord on a blind on your RV for any damage. If the cord is detached, remove end caps on the headrail to locate the cord lock mechanism where the cord usually loops.
- Step 2: Thread the cord back through the cord lock and pulley system inside the headrail, ensuring it moves smoothly.
- Step 3: If the cord is frayed or broken, you’ll need to replace it with the one that matches in both color and thickness (diameter).
Need More Help?
We are ready to further assist with easy and secure no-drill installation of curtain over your RV’s roller shades. Contact our experts using 24/7 Live Chat or call (800) 490-5720 or email support@rvblinds.com today!