Are your RV cordless top down blinds difficult to operate, or they won’t go up or down, or don’t perfectly close in the middle when raised from the top and lowered from the bottom? The simple reason is: the cordless operation system is no longer functional. Try using a 3-tug method, lubricating the sprocket, reconnecting internal strings, or spring, or consider rewiring the motor in the case of burnout.
Scroll on to learn how our 6 quick DIY fixes can make fixing cordless top down blinds easier and increase the lifespan of your RV window coverings.
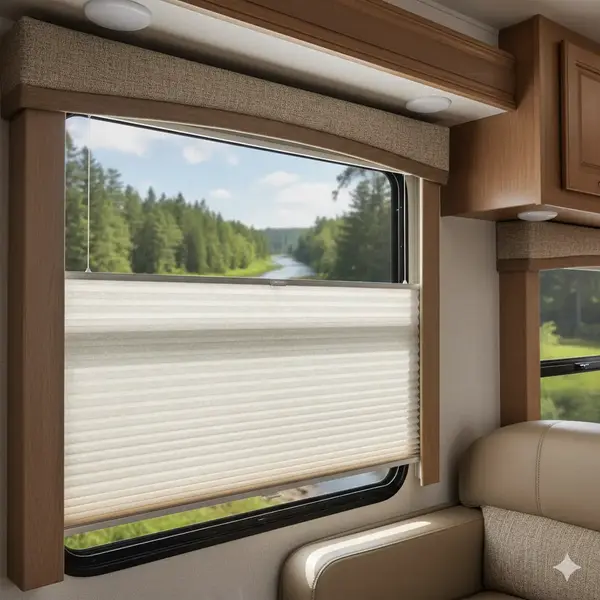
What Are Cordless Top Down Bottom Up Blinds?
Cordless top down bottom up blinds are child-safe window coverings for homes & motorhomes. They can be simultaneously raised, lowered, or positioned from both top and bottom sections, giving you extreme freedom to adjust the amount of light, privacy, and insulation in your RV.
Being totally string-free, they are CPSC-approved and 100% conform to the New Federal Safety Regulations for Custom Window Coverings in the US.
Why Restoring the Cordless Function of Your RV Blinds Is So Urgent?
It’s all about the safety of your young ones, no more, nor less! Travelling with kids under 12? Always make sure cordless (string-free) blinds are functioning properly and no internal cords are exposed. which are child-safe (CPSC-approved).
7 Reasons You Need to Fix Cordless Top Down Bottom Up Blinds
- Blinds are difficult to raise or lower – the most possible reason could be due to issues with the cordless mechanism.
- Concealed tension-generating cables or ladder strings get broken – resultantly, your cordless blinds will cease to operate and require urgent restringing.
- Blinds get crooked or uneven – the slats won’t fit tightly into each other when closed, allowing harsh sun, cold drafts, and hot wind seep through.
- Springs get ‘deactivated’ – to ‘reactivate’ the springs, lower the blind to as far as it will go.
- Tension springs are broken – welding may not work, the only better solution is replacing them with new, fresh springs.
- Top, bottom, floating rails need fixing – if any of these rails is malfunctioning, the cordless mechanism won’t work accurately.
- Mounting brackets are loose or misaligned – realigning the brackets at exact 180-degree and rescrewing them tightly could be a viable option.
Dos & Don’ts of Fixing Cordless Top Bottom Blinds in Your RV
Dos
- If the cordless mechanism needs fixing, unmount the blinds from the headrail and lay them on a flat, clean surface when fixing the cordless mechanism.
- Do wear safety gear, such as safety goggles (to protect your eyes from dirt or lubricants), work gloves (to save your hands from cuts, scrapes, and splinters), and a sturdy step ladder (if shades on the RV windows are hard to reach).
- Make sure the internal cords are not bundled up together, as it may mechanically stop the top or bottom part from raising, lowering or positioning.
- Uninstall (when removing shades) and reinstall cord safety devices (when remounting the shades).
Don’ts
- When repairing, don’t pull the strings so hard that it gets broken or damages the fragile weave.
- If your top down bottom up shades are motorized, keep water droplets or sprinkles from the electric components when fixing them.
- Avoid using wrong lubricants – we recommend a dry, silicone-based spray to reduce friction without attracting dirt and grime.
- Never ignore manufacturer’s guidelines when working on your RV’s top down blinds.
- Don’t nail your top or bottom part to the RV wall to eliminate light gaps, as it will inhibit their operation. Instead consider reducing the horizontal height of brackets, so that the fabric slides up or down while almost touching the RV walls or window frame (if mounted inside the recess).
Precautions When Repairing Cordless Top Down, Bottom Up Blinds in Your RV
- When working on motorized top down blinds or shades, turn off power or unplug the shoe to prevent electric shock.
- When using instant-dry glue to join broken cords, make sure it doesn’t spill over the fabric, as it will cause a permanent, irremovable stain.
- To prevent injuries to your little ones, keep them away from the work area in your motorhome.
- When tugging the shades to restore their function, don’t apply excessive force, lest they should get torn apart.
6 Quick, Effective DIY Fixes for Cordless Top Down Bottom Up Blinds in Your RV
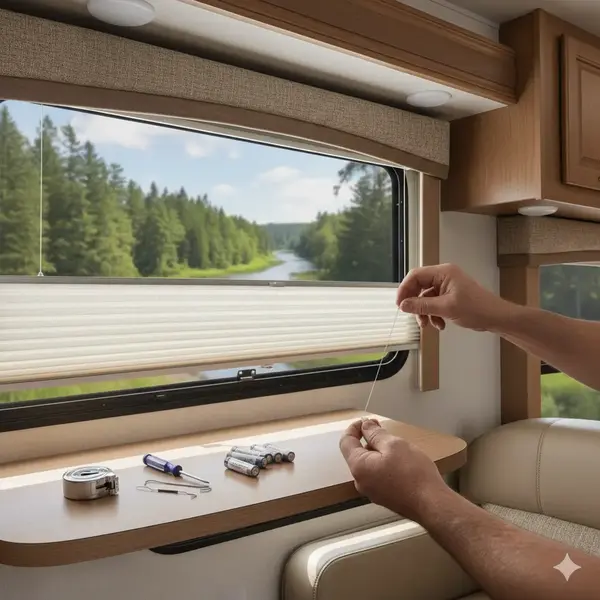
1. The Simplest 3-Tug Method – Restore Cordless Operation of Your RV Blinds without Unmounting Them
- Step 1: Lower the bottom section of the blinds all the way down, pulling it beyond the RV window sill.
- Step 2: Give the fabric three gentle jerks. The function will be restored. If this trick doesn’t work, consult an RV blind expert.
Pros
- A troubleshooting technique that requires no tools or professional assistance
- Three simple pulls to put your travel trailer blind back to work
- An easy, quick, and totally free solution for non-functional cordless blinds
Cons
- Risk of damaging tender weave with forceful tugs.
- The spring may get over tightened/tensioned.
Note
This procedure works best for spring-loaded top down bottom up blinds, helping the spring get back its tension. Don’t try this method on chain-operated and electric window covering in your camper van.
2. Loosen or Tighten Internal Strings
- Look for ladder cords that are too loose or too tight.
- Remove knots at the bottom rails of top and bottom sections.
- Adjust tension and reknot the stings. All done!
Pros
- A novice-level DIY option – requires no special skills on the part of a DIYer.
- No spare parts needed.
- Will prevent the need for more complex, costly repairs.
Cons
- May result in breaking cords in old blinds in your RV
- Risk of permanent damage to the top down bottom up mechanism
3. Straighten Knotted, Tangled Internal Strings
- Step 1: Inspect the internally woven ladder and lift strings.
- Step 2: If there are any knotted, tangled cords, unknot and untangle them gently.
- Step 3: If knots are hard to remove, just cut away the knot and rejoin ends. You may need an extra piece of the similar string to compensate for the length removed with the knot.
Pros
- Avert further damage to your precious RV window blinds
- Will ensure proper tilting of the slats to customize their ability to filter the sun.
Cons
- A relatively difficult task than just loosening/tightening the strings.
- May be costlier – you may need to buy extra string to loosen over-tightened cords.
Expert Tip
Harrison, one of your RV window treatment installation and repairing experts, recommends using superglue to join broken ends of a blind, instead of a threadlocker. The latter may add to the thickness of the blind and interfere with the smooth raising and lowering of the fabric.
4. Remove Crookedness from the RV Blinds
- Step 1: Use a level tool to check if the brackets and the fabric weaves run at 180-degree.
- Step 2: If the angle is above or below 180-degree, remove and re-level the mounting brackets horizontally. Crookedness or unevenness will disappear from your motorhome window treatments.
Pros
- A simple fixture for uneven tension, frayed cords, light gaps at either of the lower corners due to the blind hanging at less than 90-degree on one side.
- Enhance the lifespan of your RV window coverings.
Cons
- You may need to redrill holes for one or more of the misaligned brackets.
- You will need extra wall plus and screws, as the older one may not work on new holes.
5. Restring Your RV Window Shades
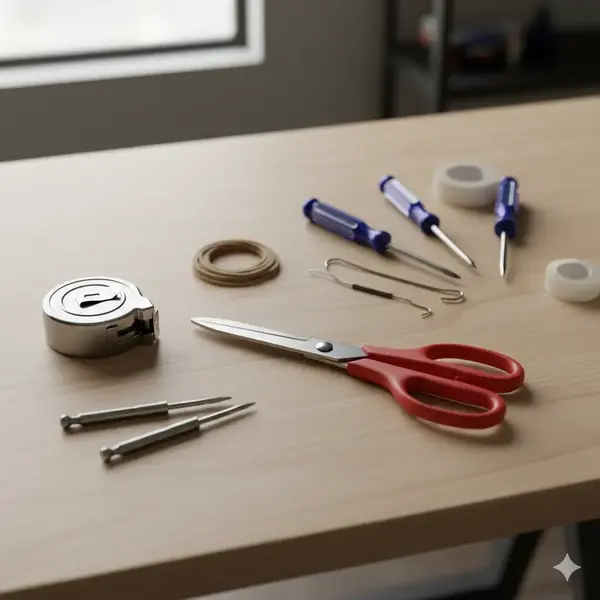
- Step 1: Gather tools (scissors, flat head and phillips screwdrivers, steel tape measure, rubber bands, wire restring tools, and scotch tape).
- Step 2: Unhang the top down bottom up blinds and lay them flat on a levelled surface.
- Step 3: Cut new strings to length separately for the upper and lower section of the blind.
- Step 4: Join new strings to each of the old strings using threadlocks.
- Step 5: Pull out old strings, making sure the new ones smoothly replace them.
- Step 6: Disjoin and remove older cords.
- Step 7: Rehang the blinds and enjoy their updated functionality.
Pros
- Equally suitable method for restringing top down bottom up Roman shades and cellular shades.
- Renew/fresh old blinds without replacing them altogether.
Cons
- A difficult and time-consuming task.
- Requires advanced level blinds repairing skills – better request a professional repairing service.
6. Recharge or Replace Dead, Drained Batteries – First Step in Troubleshooting Motoring Blinds
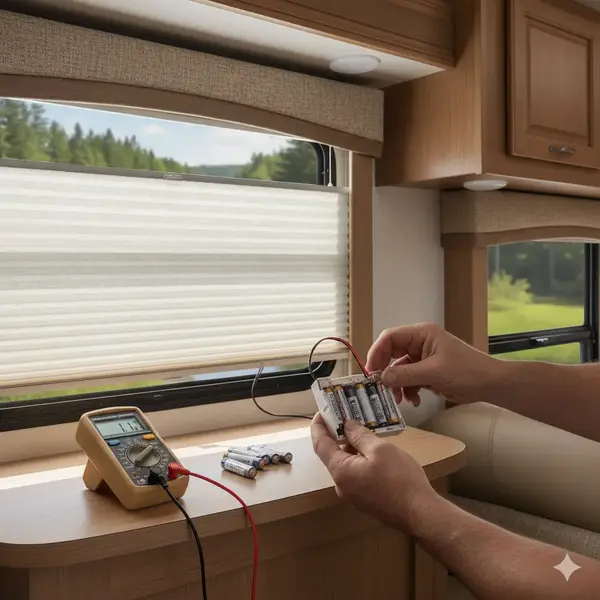
- Step 1: Recharge the batteries of both the motor and the wireless remote control. It will likely solve the issue with the lift.
- Step 2: If still the motorization components don’t work, go for replacement of the batteries.
- Step 3: If the issue remains unresolved, consult and hire a professional.
Pros
- Save big on profession repairing costs – a professional visit to replace batteries may cost you $50 to $100.
- Protect the motor – disassembling the motor can cause damage to it.
- Prevent low-voltage damage to the motor.
Cons
- Replacing batteries in the motor may not be a cup of tea for every DIYer.
- The remote may fail and cause the system to stop working.
Precaution
Never attempt rewiring a dead motor yourself as a DIYer.
Frequently Asked Questions
How to fix a cordless blind that won’t go up?
If your cordless blinds won’t go up, try removing obstructions in the RV window frame, lubricating the pull-spring mechanism, replacing hidden strings (if they are broken), or repairing the motor, if they are motorized.
Why do cordless blinds stop working?
- Disconnections, loosening or jamming the internal mechanisms that control tension and movement
- Accumulation of dirt in the spring or other parts that might block the mechanism
- Misaligned parts in the roller system, which might need readjustment to restore their operation
Expert Tip
When you start working on your malfunctioning cordless blind, make sure the fabric is all the way up.
What is the life expectancy of cordless blinds?
Cordless blinds typically last from 5 to 10 years, depending on the quality of construction, type of cordless mechanism (spring-loaded, concealed cable-based tension system, or motorization). High quality motorized cordless blinds can last 10 to 15 years, if properly maintained and lubricated after every six months.
Can top down bottom up shades be repaired?
If lift or ladder strings of your top down bottom shades are broken, try replacing them with fresh ones. Whether restringing the top down or bottom up portion, ensuring removing and replacing all the strings that operate the top and bottom parts.
How do cordless top down bottom up cellular shades work?
Cordless top down bottom up cellular shades work by any of the 3 built-in mechanisms:
- Option 1: An internal cord system with lift, lower, and lock mechanism – operating by simple push/pull on the bottom/head rails of each of the top and bottom sections.
- Option 2: An additional “moving” rail beyond the bottom rail – the “moving” rail goes up and down to raise and lower the honeycomb window covering in your motorhome.
- Option 3: Automation – just the push and re-push of a button on your wireless remote to open or close the top down bottom up cellular shade.
How do you fix the tension mechanism in cordless blinds?
- Step 1: Lower the blind down to its fullest.
- Step 2: Keep pulling blind down beyond the window sill.
- Step 3: Let it go up slowly. The tension in the spring mechanism will get restored. If it doesn’t, repeat the same process twice or thrice.
- Step 4: If all the re-attempts fail, consider replacing the spring tension mechanism as a long-term, permanent solution.
Need More Help?
We are ready to further assist with restoring the cordless functionality of top down bottom up blinds in your RV. Contact our experts using 24/7 Live Chat or call (800) 490-5720 or email support@rvblinds.com today!